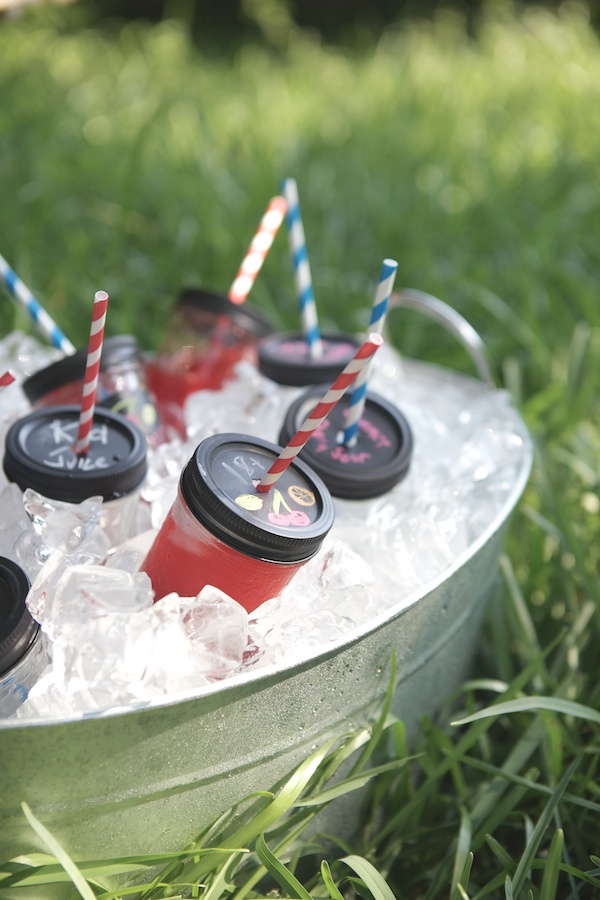
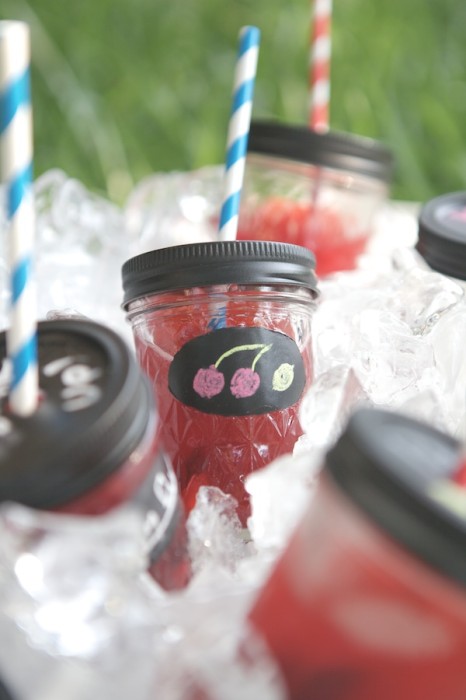
It’s the time of backyard BBQs and summertime parties, so we went looking for something fun to compliment your burgers and potato salad. We found a great recipe for Summer Cherry Sours, and a bonus with the how-to for making the pretty chalkboard mason jars you can drink them from.
Summer Cherry Sours: While whiskey is distilled from grains and brandy is distilled from fruit, both have a flavor profile that I believe pair well together, especially in a drink like this containing sweet and tart/sour fruits.
Take care to note when mixing the Cherry Citrus-Ade to use as a cocktail mixer in the Summer Cherry Sours, you skip the step where you add water.
SUMMER CHERRY SOURS
Yield: 4, 4 fluid ounce cocktails
Time: 2 minutes
Tools:
4 Mason Jar Glasses (instructions below)
Cocktail shaker
Ingredients:
12 ounces (1 1/2 cup) Cherry Citrus-Ade (recipe below)
2 fluid ounces good brandy
2 fluid ounces good whiskey
Instructions:
1. Pour the ingredients in a cocktail shaker. Shake vigorously for a few seconds.
2. Pour the cocktail over ice into 4, 8 ounce mason jar glasses (or into old fashioned glasses).
Cherry Citrus-Ade: I suggest buying sweet cherries for this recipe though you can use any variety of your choosing. Muddling the cherries helps get their juices into the drink. This will be a pulpy drink.
CHERRY CITRUS-ADE
Yield: 1 quart Cherry-Citrus-Ade
Time: 10 minutes
Tools:
4, 8 oz Mason Jar Glasses (instructions below)
1 quart pitcher
Muddler
Citrus reamer
Paring knife
Ingredients:
12 ounces cherries, pitted
2 fluid ounces simple syrup*
2 fluid ounces lemon juice
2 fluid ounces lime juice
1/2 cup grapefruit juice
12 ounces water (do not add this ingredient if making a cocktail mix)
Instructions:
1. Add the cherries and the simple syrup to the pitcher. Muddle the cherries until they are broken apart.
2. Add the lemon juice, lime juice and grape fruit juice. Mix well. If you are making Cherry Citrus-Ade as a cocktail mix then skip step three.
3. If you are making Cherry Citrus-Ade to drink on its own add the 12 ounces water and mix well.
4. Serve over ice or on its own.
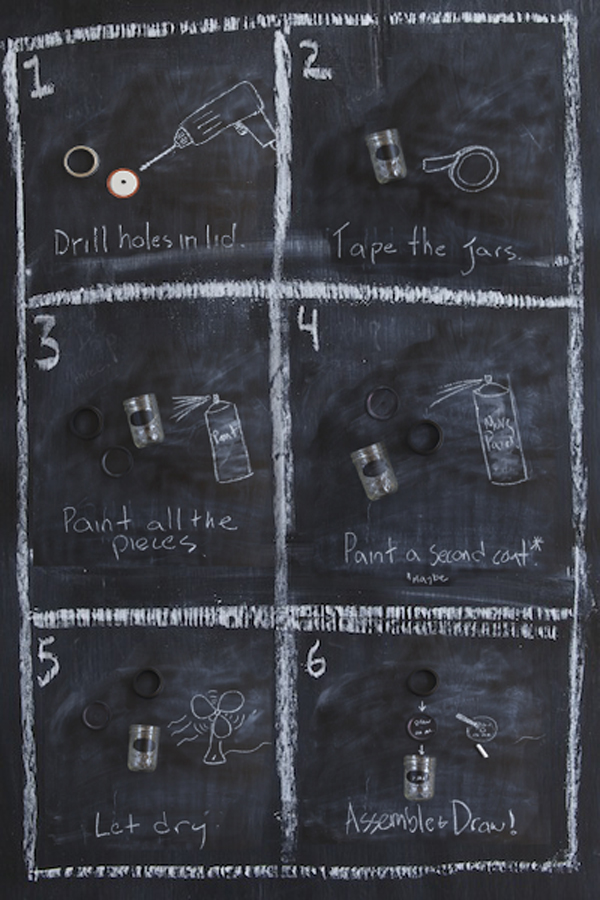
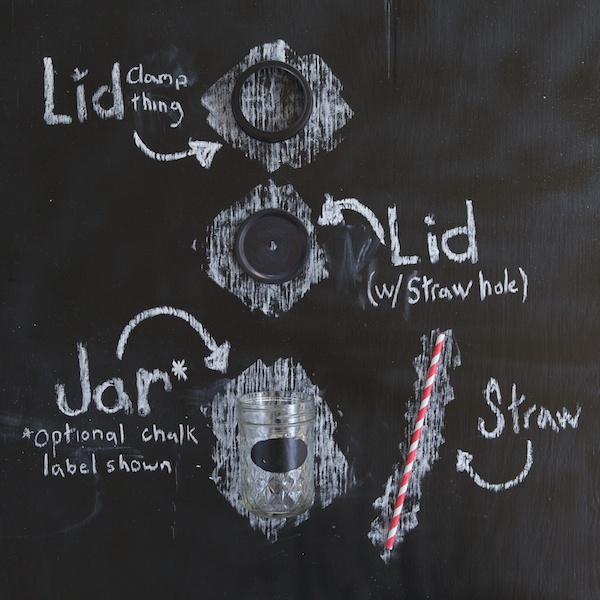
Mason Jar Glasses: So long as you don’t have a penchant for amputating appendages when you use power tools, these glasses are incredibly easy to make. This can be done with any size mason jar. If you plan to paint a portion of the glass (in addition to the lid) make sure you choose mason jars with a smooth glass side.
Take care when attempting this project as the metal can become very sharp while drilling and filing the straw hole. Be sure to remove all filings or bits of metal that may still be attached to the lid before drinking from the jars.
CHALKBOARD MASON JAR GLASSES
Yield: 12 Mason Jar Glasses
Project Time: 1 hour
Drying Time: 12-24 hours
Tools:
Power drill
5/16th inch metal drill bit
Needle nose pliers or metal shears
Metal file
X-acto knife
Masking tape
Supplies:
12 Mason Jars, any size
Black chalkboard spray paint
Striped paper straws
Instructions:
1. Separate the pieces of each mason jar. Lay the lids on a flat, thick piece of wood (one you don’t mind drilling into). Using care, hold the edges of the lid to keep the lid from spinning around (you may also use a clamp here), and drill into the center of each lid. Drill at a moderate speed as drilling too fast or too slow may cause the edges of the straw hole to be uneven.
2.If there are any pieces of metal hanging on to the lid, use needle nose pliers or metal shears to remove them.
3. Using a thin, small metal file, file the edges of the straw hole from the top to smooth out any rough or sharp edges.
4. If you plan to paint a portion of the jar, tape the entire jar (including the top to keep paint from getting to the inside) and use an x-acto knife to remove tape in the shape of the area to be painted.
5. In a well ventilated area, preferably outside on a dry day, lay all the pieces out on newspaper or a tarp. Spray a thin layer of paint completely covering the tops of both lid pieces, and the expose glass on the jars. If necessary repeat and apply a second coat.*
6. Leave the painted pieces out to dry overnight.*
7. Wash all the pieces by hand with mildly soapy water. Hand dry and assemble.
*Always follow the instructions on the paint can. When using spray paint, it is best to move the can and nozzle from side to side, painting in horizontal stripes. Take care not spray paint in one are too long as it may run.